Monday, December 27, 2010

Tissue Poms Tutorial

Welcome back! I hope you all had a wonderful Christmas. I can never get enough time with family so this is my favorite time of year.

I thought I would share with you a quick tutorial on how to make the hanging and table top tissue poms. You can go to Martha Stewart for a quick step by step as well.
Please excuse the dark pictures. I decided as I was finishing these at 11pm for my daughters party it would be a good post.

First off pick up your desired color of tissue paper. The heavier duty the better. The thinner paper I had tore very easily when I separated my layers. You will need sheets approximately 20x30 inches. I had some that were a bit smaller than the 30 inches so I just cut the 20 inch side down a little bit too.  Honestly I don't think it really matters what size you start with if you don't care if they are exactly the same size. I did not. I think it added to the whimzy.

For the large hanging poms you will want to stack 8 sheets of tissue paper on top of each other. Accordion fold them at about 1 1/2 inches.

Fold in half to mark where you will tie your wire.

Twist floral wire around the center point and twist. Trim off ends.

Cut ends with scissors into a round or pointed tip. 


Fan your folds to look like this.

And start to pull apart each layer one at a time.

I found it easiest to pull from alternating sides that flip it over about half way through and do the bottom to make it full all the way around..

Fluff the layers to make a full ball. Tie ribbon around the middle where wire is and hang.

To make a mini pom start with 5 12x7inch tissue sheets. I would use another sheet or 2 of tissue for a full ball. I made halves that sat on the table.

Repeat all of the above steps folding your accordion at 1/2-1inch. For a table top or napkin ring version when you separate the layer only pull them one way. Leave the bottom side flat to look like the picture.


Here is your end result. A beautiful setting fit for a princess.


I hope you get a chance to use this for your upcoming parties. They are so fun, super easy, and add tons of color to the party room.

Thursday, December 23, 2010

Teacher Gifts

I wanted to do something for the 3 teachers in Madison's preschool class for Christmas. I decided that a pack of handmade cards was the perfect way to go. I made a set of 6 coordinating Thank You cards in pink, orange, and green that I divided into 2 packs of 3. (I will make more and share with you later.) 

And a second set of 2 for the younger teacher assistant.

I wanted to make them a bit more festive so I put them in a clear poly bag and added a header to them with a matching green paper. A die cut snowflake, stamp saying Thanks snow much!, and a sweet 4 year olds name written on the back by her, and I had a cutely packaged gift. 

I hope they enjoyed them and will have fun sending them to friends.

Monday, December 20, 2010

Ladybug Birthday Party Set

I was asked to create a ladybug party line for a birthday in January. I just mailed it all out this week.
I love the look of the red, black, and white in this set. So crisp and clean but fun a girly at the same time. 

The invitations you probably recognize from a previous post.


Here is the completed inside wording. I love the font. It was also used on the banner, centerpiece, and cupcake toppers.

Party Sign/Door Hanger


Cupcake toppers- 4 styles(set of 12)

Of course these are mounted on sticks.

Centerpiece- This is my new larger size. The Ballet and Princess parties were made in the same size. The circles are 5.5" and 4.5". Smaller version was 4" and 3". All centerpieces can be done in either size depending on your need.

Banner

Tied with a cute black ribbon with white stitching.

A new item in my lines is thank you cards. I am working on creating several versions.

This one is stamped at the top.

Mini ladybug die cut in bottom corner.

I am also working on some coordinating ribbon topiary and thank you tags which I will post when they are done. I cannot wait to see them both completed. Watch for more soon.

Sunday, December 19, 2010

Cookie Mix Favor Jars

I have been asked by several times to share the instructions for the Cowboy Cookie Mix in a jar that I made as party favors for the western baby shower I threw. I thought this would be a perfect last minute gift idea to share this week before Christmas. I made several more of these to use as "stocking stuffers" :) for my extended family and gifts for neighbors. I have done other versions of these in the past for holidays and everyone always loves it. I just used the last of my plaid fabric since it goes with the cookie theme but you can make them super festive with holiday fabric and ribbon. You get so many yummy goodies during the holidays and this is a nice way to give a treat that they can make when the last of the sugar cookies have been thrown out.


Unfortunately I did not think to take step by step photos during the process but I am sure you can follow along.
  • First start with buying as many wide mouth quart size canning jars as you will need for your gifts. 
  • Line them up on your counter to make an assembly line. 
  • You are going to add one ingredient at a time to each jar. I used this recipe with 2 small changes and a little different order to put the layers how I wanted.

    Ingredients

    • 1 1/3 cups rolled oats
    • 1 1/3 cups all-purpose flour
    • 1 teaspoon baking powder
    • 1 teaspoon baking soda
    • 1/4 teaspoon salt
    • 1/2 cup butterscotch chips
    • 1/2c cup semisweet chocolate chips
    • 1/2 cup packed brown sugar
    • 1/2 cup white sugar

  • Measure exactly to fit it all ingredients in. Press each layer firmly in place before adding the next layer.
  • Screw lid on.
  • Cover with fabric and tie around neck of jar with ribbon or twine.
  • Create label with directions for mix. Attach card to ribbon or make into a label and adhere to jar. Mine were labels adhered to the back of the jar for photo purposes.

Directions 

Cowboy Cookie Mix in a Jar 1. Preheat oven to 350 degrees F (175 degrees C). Grease cookie sheets. 2. In a medium bowl, mix together 1/2 cup melted butter or margarine, 1 egg, and 1 teaspoon of vanilla. Stir in the entire contents of the jar. You may need to use your hands to finish mixing. Shape into walnut sized balls. Place 2 inches apart on prepared cookie sheets. 3. Bake for 11 to 13 minutes in the preheated oven. Transfer from cookie sheets to cool on wire racks.


Lastly, enjoy giving the jars to family and friends. I hope you try these and enjoy some cookies for yourself. 

Friday, December 17, 2010

Ballet Birthday Party Set

My best friend's daughter is 1 day older than my daughter. It has been so much fun having them grow up together and both have birthdays in December. This last weekend was Sydney's Ballet party. The girls all arrived at a ballet studio in leotards and tights and she provided the tutus. They looked so cute.
I was privileged to be asked to create several things for the party.

First of course was these invitations.

She picked out the ribbon she was wanting to use throughout the party and we coordinated everything with that. I love the simple clean look of the satin bow.

Inside featured the die cut ballet slippers that were used on all of the party decor.


The girls were greeted at the door by this ballet party sign letting them know they were in the right place.


Ballet Happy Birthday party banner


The ballet centerpiece. She added a tutu to a trifle bowl and inserted the centerpiece sticks. A perfect way to tie in the theme again in the simplest way.

These can be customized for any party. Any wording or name can be added, age, or even 2 sets of ballet slippers.

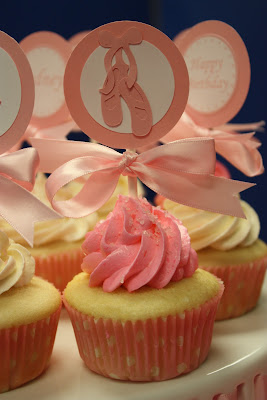
Ballet Cupcake toppers.
 

These come as a set of 12 (3 of each) with the birthday child's name, Happy Birthday, ballet slippers, and age.
This was such a fun party to be a part of. Thank you Dara for allowing me to help you create such a fun party space.

Friday, December 10, 2010

Princess Birthday Party Set

If you have been on my facebook page then you have seen these photos, but I cannot resist sharing anyways. I had a blast throwing my daughter a Princess Party for her 4th birthday. She absolutely loved it and so did all the other little girls. Enjoy!

Each of the girls received this princess invitation a month before with their own mini wand to get them excited.

At the front door they were greeted with this princess crown door sign.

My daughter was absolutely thrilled that the "real" Cinderella came to her party. It was the hit by far for all the girls. She did their make-up, they danced, and she read a princess story.

The princess crown happy birthday banner going into the party room.

Another view in 2 layers.

The Princess table.

Each girl had their own special seat with a crown, place card, and gift bag full of goodies to use at the party. Jewelry, lip gloss, nail polish, and more.


A close up of the princess crown place cards.

A close up of the princess crown party bags. So cute and easy for each girl to have their own. Who doesn't love their name on something.

Tissue poms above table.

Mini table poms and crowns found in the craft store dollar section. A little paint and a cute decoration for very inexpensive. Amazing where you can find inspiration.

The centerpiece.

A close up look at the princess crown centerpiece.

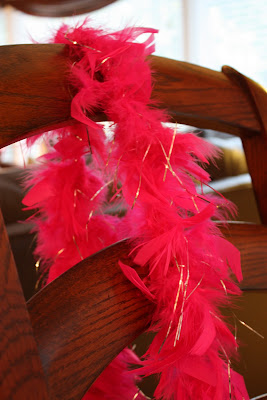
A boa at each chair added so much color.

Nail Polish station. I found these silver trays at the Dollar store. It was a simple way to make it look a little more royal.

Cinderella's make up station and wands for each girl.

The princess cake.

Even pink inside.

My little girl and her bestie. They both turn 4 a day apart. We get to attend her ballet party tomorrow. So excited to see it all come together.

Happy Birthday Girls!