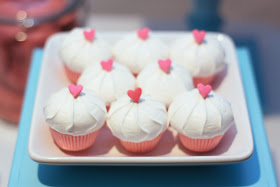
I started with store bought meringues from Trader Joes, mini cucpake liners, wilton's candy melts, pink gel coloring, and some large sprinkles.
Melt your candy melts in the microwave for 1min followed by 30second intervals stirring each time until smooth. I placed my liners on a small tray and filled them to the top with the melted chocolate. I then carefully grabbed the edge of the liner and tapped them on the tray to level the top and allow any air bubbles to rise. This also helped fill in the creases of the liner to create the wrapper look. Place filled liners in refridgerator to cool until firm. It only takes a few minutes but I left them for around 30min. to make sure they were set all the way through.
Once you remove the cupcake bases from the fridge peel off the paper liners. (Sorry I should have taken more pics of the next 2 steps.)
Next I remelted the remaining chocolate and put it in a squeeze bottle. You could also just use a small spoon. I squeezed a small amount of melted chocolate on the top of the candy melt cupcake base. Just press your meringue onto the melted chocolate. Once it dries this will keep the top and bottom together.
Next take your melted chocolate and place a tiny drop onto your sprinkle of choice. Press it onto the tip of the meringue. This helps hide any broken tips and finishes the look.
Display on a cute tray. Adorable cupcake perfection. They taste as yummy as the look.
I hope you try these adorable meringue cupcakes for your next cupcake party. Enjoy!
Check out more of the bake shop party dessert bar & cake here and the party details here.


Adorable! Look perfect for Valentine's Day!
ReplyDelete