Welcome to 5M Creations!
I love creating custom party decor. I have many products including: name banners, cupcake toppers,
centerpieces, invitations,thank you cards, favor tags, and more. I also make handmade greeting cards.
Please check out my etsy store to see my current items for sale. www.5mcreations.etsy.com
Email me for more info on a custom set to match your event. Thank you for visiting.
I love receiving comments and messages from visitors so please let me know you stopped by.
Melissa

Friday, December 21, 2012

Meringue & Candy Melt Cupcake Tutorial

One of the treats I made for my daughter's bake shop party were the meringue mini cupcakes. I was inspired by the Cupcake Boxes by Sweet Simple Stuff. I changed them up a little by making a solid bottom. I didn't want them to come apart in the girl's bakery boxes they were taking home.


I started with store bought meringues from Trader Joes, mini cucpake liners, wilton's candy melts, pink gel coloring, and some large sprinkles.
Melt your candy melts in the microwave for 1min followed by 30second intervals stirring each time until smooth. I placed my liners on a small tray and filled them to the top with the melted chocolate. I then carefully grabbed the edge of the liner and tapped them on the tray to level the top and allow any air bubbles to rise. This also helped fill in the creases of the liner to create the wrapper look. Place filled liners in refridgerator to cool until firm. It only takes a few minutes but I left them for around 30min. to make sure they were set all the way through.
 
Once you remove the cupcake bases from the fridge peel off the paper liners. (Sorry I should have taken more pics of the next 2 steps.)
Next I remelted the remaining chocolate and put it in a squeeze bottle. You could also just use a small spoon. I squeezed a small amount of melted chocolate on the top of the candy melt cupcake base. Just press your meringue onto the melted chocolate. Once it dries this will keep the top and bottom together.
Next take your melted chocolate and place a tiny drop onto your sprinkle of choice. Press it onto the tip of the meringue. This helps hide any broken tips and finishes the look.
 
Display on a cute tray. Adorable cupcake perfection. They taste as yummy as the look.
I hope you try these adorable meringue cupcakes for your next cupcake party. Enjoy!
 

Wednesday, December 19, 2012

Baking Birthday Party- Pink & Aqua Dessert Bar & Pink Ruffle Cake

I am back with more details from the bake shop birthday party. When I started planning this event I knew I wanted to create a faux bakery look with a pink and aqua blue dessert bar. I will be sharing the step by step of how this look came together. I started with some DIY dessert trays in aqua blue and an assortment of pink and cupcake themed treats. The girls were given a bakery box at the end of the party to fill with the yummy items.


 The Treats
Pink Dipped Marshmallows with Pink Striped Paper Straw Sticks

 
These are such a fun and easy treat to make. I used our striped paper straws cut in half in place of a lolipop stick to add even more color to the tray. The marshmallows were dipped in Wilton Candy Melts and sprinkled with nonpareils.

 Mirengue Cupcakes - A DIY tutorial will be coming soon.

These cuties were inspired by this great blog post. Although I made a few changes.

 Pink chocolate chip cookies and pink drizzled peppermint white chocolate covered pretzels.


The chocolate chip cookies were made by using my basic chocolate chip recipe. I relaced the brown sugar with all white sugar and the vanilla with clear vanilla to make a more white batter. Then I added pink food coloring til the desired color. So easy!

The pretzels were one of my store bought and dressed up cheat treats. I bought the dipped snowflake pretzels from Costco and added a pink drizzle of Wilton candy melts to make them match my pink theme. There is no rule that says everything on your dessert bar has to be homemade.

 Cupcake Sugar Cookies

These gorgeous cookies were purchased from Baked Perfection. She custom made these to match my party decor. I love the chevron stripes on the candle. They came packaged in clear cello bags and ready to use. They would make an adorable party favor all on their own.


These are another of my store bought items. I dressed up a basic boxed powdered donut with a pink polka dot cupcake wrapper and a cupcake topper. Who says cupcake toppers have to go in cupcakes. 


Store bought brownie bites with a dallop of pink buttercream from our cupcake making.


The Pink Ruffle Cake

 Deciding on a cake was probably one of the biggest decisions I made for this party. I had seen many ruffle cakes on pinterest but was nervous about them being executed properly. I had seen many flops as well. Finally I decided on half of the cake covered in sweet ombre fondant ruffles. I liked that the silhouette of the cake resembled the aprons the girls wore. 

 I originally was going to have a baker's hat on top but decided to keep it clean and girly. A fondant 6 and ruffle flower cake topper were the perfect addition to this sweet cake. 

Make a WISH!
 
 I couldn't have been happier with how this cake came out. Thank you so much to Rebecca for making it possible.
 
Check out the rest of the party here.
More party details to come.


Sunday, December 9, 2012

Madison's Bake Shop - Baking Birthday Party - Printable Party Line

This weekend we celebrated my daughter's 6th birthday with a Bake Shop themed birthday party. I fell in love with this idea 2 years ago and it was so much fun to finally see it all come together. I gleaned ideas from many amazing parties to create my own one of a kind event for my special girl. The party guests all seemed to enjoy the hands on activites.
 
 
I  knew that I wanted a faux bake shop look in my home. I created that look with this adorable faux awning, store sign, baked goods display, and some adorable bakery boxes.
 
The sign was made from a canvas and vinyl letters. Super easy and a huge statement piece.


I knew I wanted to create a gorgeous dessert bar with lots of height and many types of treats for the girls to take home. More posts coming on this later. (incuding my DIY stands)


A few of the little details.
The birthday girl wore a custom made necklace by Zadee Jane Boutique and cupcake headband by Whimsical Fairytales.

 
I tried to use our color scheme throught every aspect of my party space. The utensil container got dressed up with a pink bow. The white boxes were used for the girls to fill up with treats from the dessert bar were given an aqua bow, and pink roses. Each place setting had a ruffle apron and matching baker's hat with flower rosette. These were a part of the girls' party favors.
 
Even our American Girl Doll got in on the baking fun. This bake set was my daughter's birthday gift. We lucked out that it matched our party so well.
 
I added these cute Bake Shop printables from my line to my photo frames. Such an easy way to incorporate your theme into every aspect of your party space.
 

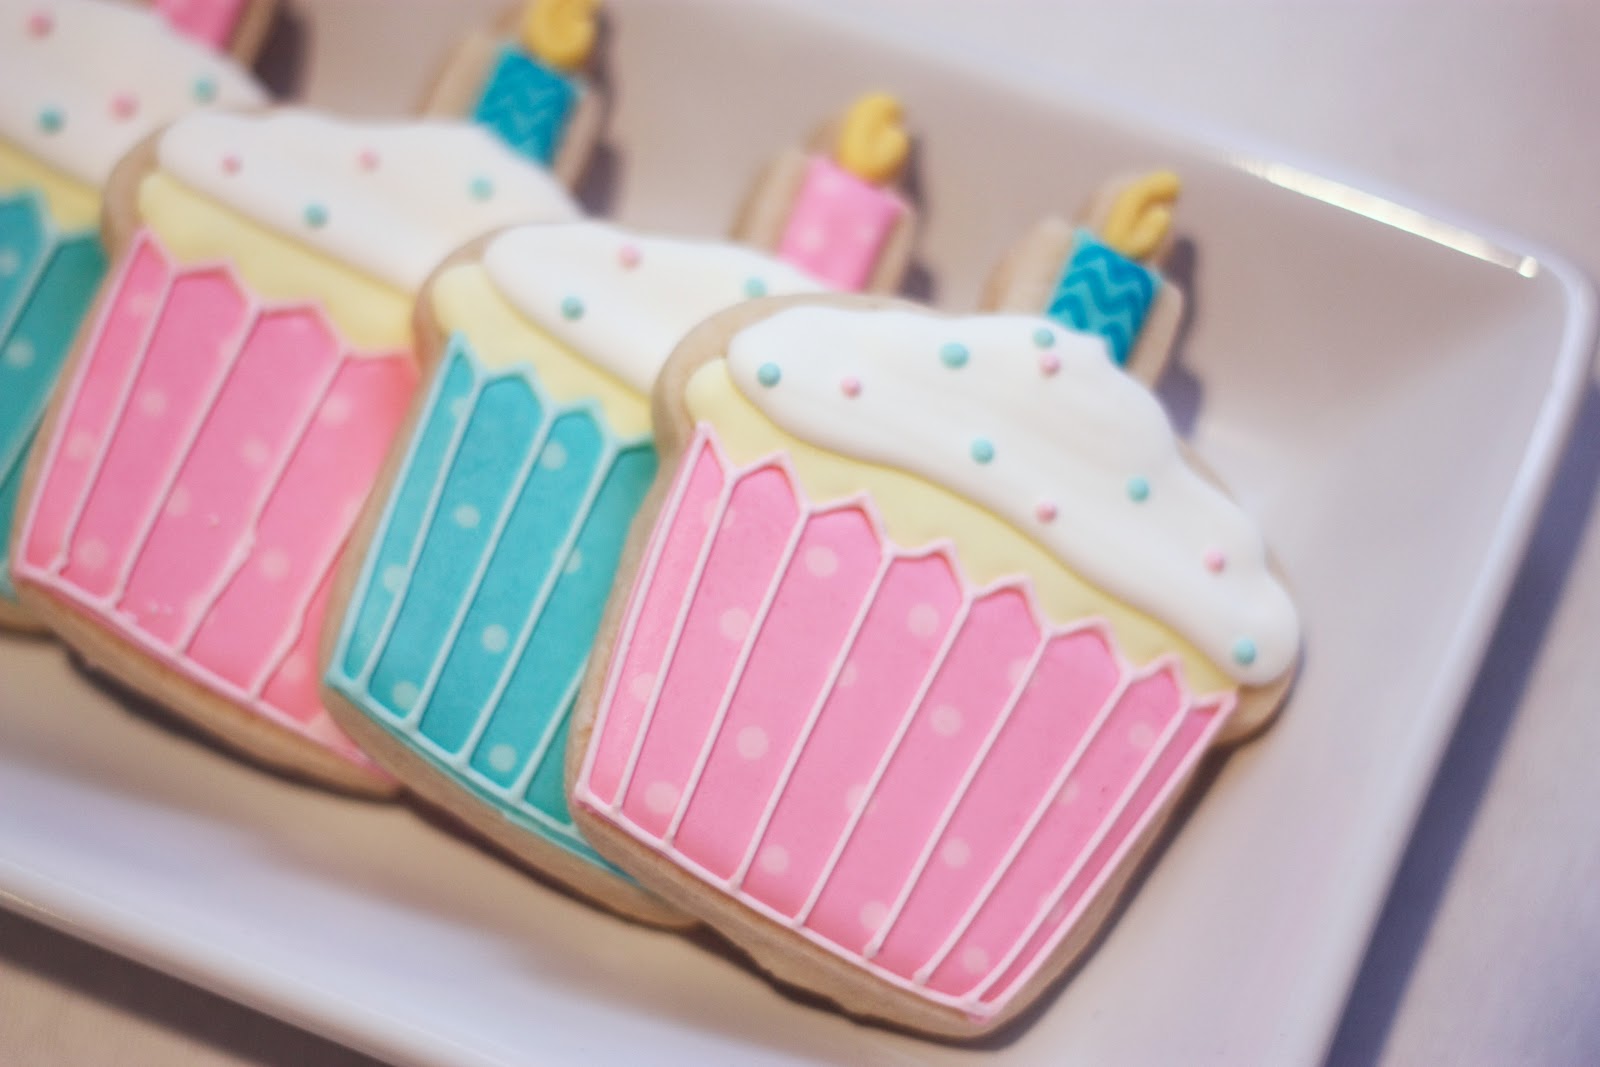
 A 5M Creations Bake Shop Centerpiece, apothecary filled with pink marshmallows, and glittery hot pink 6 continued the theme into the kitchen.

This Happy Birthday Bake Shop Party Banner from my new line was the perfect addition to the cupcake decorating area. 

These adorable aqua blue cake boxes were used to transport their creations home. They feature a personalized tag from the bake shop party line.
 
 
The main space of our party was of course the kitchen and dining table. The girls started by making pizzas for dinner. Each girl had their own personal pizza with toppings of their choice.
 
While the pizzas baked we moved onto cupcake decorating. We had pink and aqua frosting to match the party colors and sprinkles of all kinds. One of my favorite touches in the party were the glass bottles with labels from my baking party line and striped paper straws carried in my store. So cute and vintage feeling. Perfect for sipping pink lemonade with their dinner and cake.
 

The girls had a blast using real icing bags and TONS of sprinkles. I think I will be finding them for weeks.
 
Cupcakes in progress! The paper cups helped contain the frosting and sprinkles more than a standard liner would have.
 
All wrapped up to go home.
 
The girls all looked adorable in their ruffle aprons and baker's hats. As the parents arrived they filled their white bakery boxes with all kinds of treats from our dessert bar. The perfect ending to a fun party.
 
And finally the birthday girl. Happy Birthday sweetie.
 
Watch over the next few days for a closer look at the cake, food, faux bake shop, DIY stands, cupcake liner garland, and the printable invitations and party line used. More Bake Shop fun coming your way.
 
UPDATE: